When Installing Windows 11 Pro, your hard drive might get forcefully encrypted using BitLocker which can lead to data loss
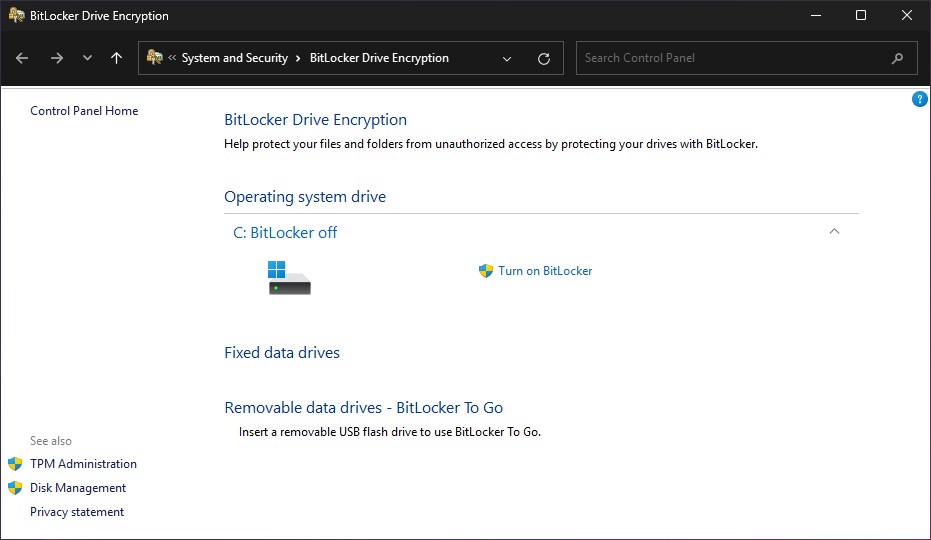
When it comes to installing Windows 11 Pro under the correct circumstances during setup Windows might automatically and forcefully encrypt your hard drive using BitLocker Encryption without you knowing about it. Making data loss a real possibility…

While this is a good security measure the user might be completely unaware that this happened which can later lead to loosing all your data and access to the drive.
Understanding the Need for Automatic Encryption
BitLocker is designed to safeguard your sensitive data – photos, documents, and more! It’s an excellent security feature that offers encryption on local drives. However, sometimes users find this automatic approach a bit overwhelming or inconvenient.
Before we dive into disabling it, let’s break down the conditions for BitLocker to activate:
- Secure Boot Enabled:
This ensures that your computer starts in a controlled and secure environment, minimizing threats from malware and other security vulnerabilities. - TPM (Trusted Platform Module) Chip Present:
This tiny chip embedded on many motherboards acts like a trusted source of identity for your system, verifying its authenticity before booting up. - Windows 11 Pro Version:
This version unlocks the full power of BitLocker for secure data protection. - Microsoft Account Sign-In:
A Microsoft account is necessary for Windows to access your key if it’s encrypted in Windows 11.
BitLocker will only encrypt your Drive when the above mentioned conditions are met and you install Windows 11 Pro using an online Microsoft Account.
For a local offline account BitLocker will not automatically encrypt the hard drive unless you opt in and use it.
Disabling Automatic Encryption: Two Options
Let’s explore two ways to disable automatic BitLocker encryption: If you prefer not to have BitLocker encrypt your data by default, you can disable the forced encryption with a simple registry tweak. Follow these steps:
1. Manually disable and Bypass the Encryption (Recommended) during setup
- During the Windows 11 Welcome experience, press Shift + F10 to open a Command Prompt window.
- Type taskmgr.exe and press enter to open Task Manager.
- With a new Task Manager opened make sure the “Run New Task” option is selected.
- In Task Manager, click Run New Task and type regedit. Select Admin Privileges and press OK to open the Registry Editor.
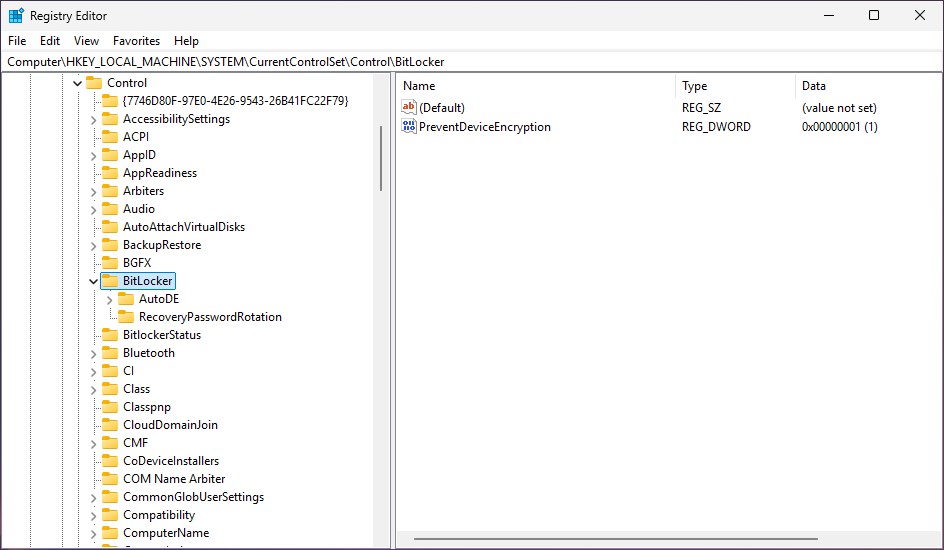
- Navigate to HKEY_LOCAL_MACHINE > SYSTEM > CurrentControlSet > Control > BitLocker.
- Right-click on the empty white space, create a New DWORD (32-bit) Value, and name it PreventDeviceEncryption.
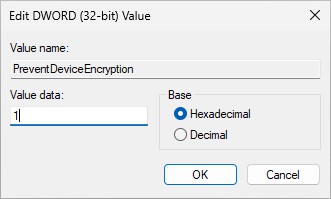
- Set its value to 1 to disable the forced BitLocker encryption.
- Close all windows and continue with the setup as usual. BitLocker encryption will now be disabled by default.


You can always re-enable BitLocker to encrypt your hard drives at a later stage. this is only to prevent it from doing so during setup.
2. Utilizing Third-Party Software (Alternative)
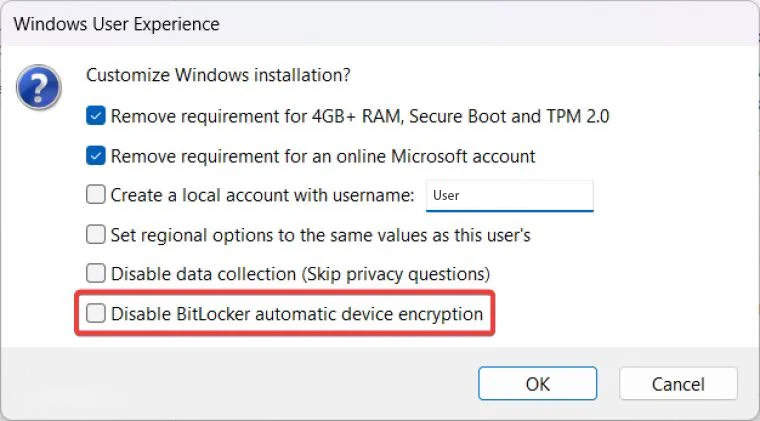
- Consider using reputable third-party software such as Rufus.
Rufus has a few settings in that can make life a whole lot easier when preparing to install Windows 11:

Important Considerations:
The Importance of a Backup Key The automatic encryption process usually encrypts your data with a unique key.
It’s important to understand that without access to this decryption key, you can not decrypt your data should anything happen. This is where the backup key comes in!
Windows will automatically backup the Decryption key to your Online Microsoft Account however we advice that you still make a hard copy of this key.
Computer Repair Shops will not be able to assist you in data recovery without this key or perform any repairs to Windows 11 is something goes wrong.
How to Create and Store a BitLocker Backup Key:
- Store on External Media (Recommended):
The safest approach is to create a physical copy of your BitLocker decryption key. Secure this copy safely – consider keeping it in a fireproof safe or a separate encrypted hard drive. - Back Up with Online Services (Second Option):
You can back up your key to a secure cloud service like Google Drive, Dropbox, or OneDrive.
Losing access to your account and your key means losing access to all your valuable data. In a worst-case scenario, this could mean losing everything!
Why is It So Crucial?
Losing access to your account and your key means losing access to all your valuable data. In a worst-case scenario, this could mean losing everything!
Conclusion: Embrace Control with BitLocker
While automatic encryption can be convenient, it’s crucial to understand the implications and take control of your security settings.
By choosing the appropriate method for disabling or managing Bitlocker on your Windows 11 system, you maintain greater flexibility while enjoying peace of mind.
Remember, having a backup key is essential for recovery. Don’t wait – get started with securing your data today!
Therefore users that plan to install Windows 11 Pro needs to make sure they are covered. Same goes for users that bought new computers pre-installed with windows 11 on.


